How to Choose a Walk In Humidity Chamber?
Choosing a Walk In Humidity Chamber is a practical decision for laboratories, manufacturers, and quality teams. The right system must reproduce controlled moisture and temperature conditions without creating hidden testing risks. Chamber volume, humidity range, temperature stability, recovery time, and internal loading space all matter. So does service access.
A small mistake can become expensive. A chamber that looks impressive in a showroom may struggle when loaded with pallets, racks, cables, or heat-producing samples. Measure the largest test article, door clearance, floor strength, and available utilities before comparing brands. Check how sensors are calibrated, how water is treated, and whether alarms record real events. These details reveal more than a polished brochure.
Experience also shows that “maximum humidity” is not enough information. Ask how evenly moisture is distributed, how quickly the chamber recovers after door opening, and whether condensation threatens the samples. Independent test data, documented calibration procedures, warranty terms, and responsive technical support improve confidence. Standards and test methods should match the intended application, not merely the supplier’s sales language.
No chamber is perfect. Maintenance time, noise, energy use, and operator training may be underestimated. A thoughtful selection balances performance, reliability, safety, and total ownership cost. The best choice is the chamber that fits real work, not the one with the longest feature list.
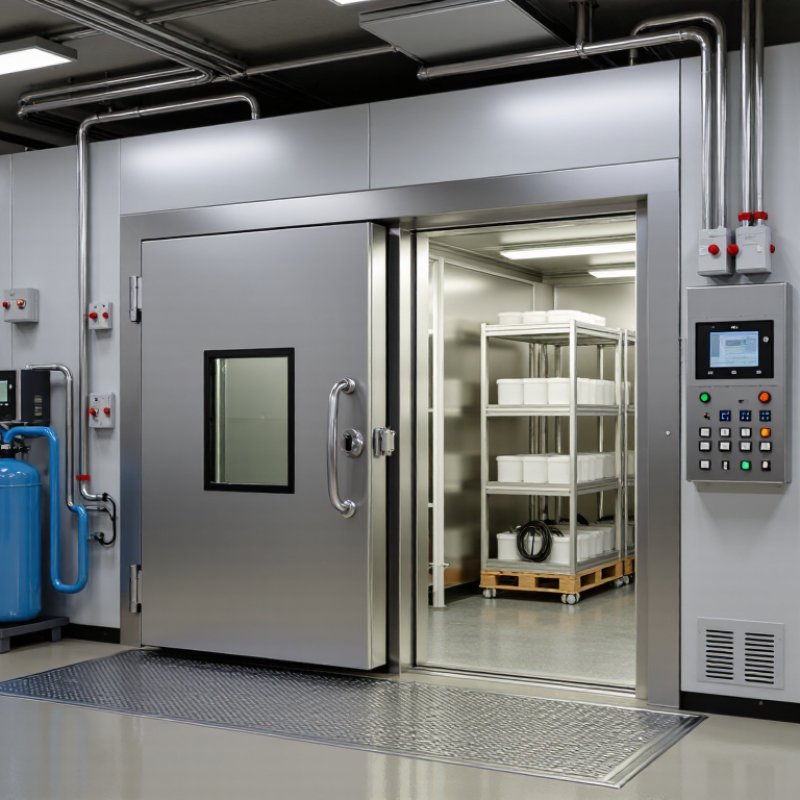
Define the Testing Purpose and Environmental Requirements
Choosing a walk-in humidity chamber begins with the failure you need to investigate. Moisture absorption, corrosion, insulation breakdown, and package leakage require different exposure profiles. A chamber sized only by product volume may produce misleading results.
Use recognized test documents to define the environment. IEC 60068-2-78 describes steady damp heat testing, commonly using 40°C and 93% relative humidity. The required duration depends on the product and qualification plan. For pharmaceutical stability work, ICH Q1A(R2) identifies long-term conditions of 25°C/60% RH and accelerated conditions of 40°C/75% RH. These figures are not interchangeable. They represent different risks and industries.
Document temperature, humidity, duration, ramp rate, and recovery limits before requesting equipment. Check the largest product footprint, door openings, heat generation, and air circulation. A loaded chamber can behave differently from an empty chamber. Sensors should be calibrated against traceable references, with records kept for each test cycle. ISO/IEC 17025 provides a useful framework for competent calibration laboratories.
Be specific. “High humidity testing” is too vague. A better requirement might state: 40°C, 93% RH, 96 hours, five loaded shelves, and recovery within a defined period. In practice, teams sometimes select severe conditions without proving relevance. That can waste energy and damage products unrealistically. Reconsider the profile when field failures do not match laboratory results. A clean test plan is valuable, but real-world moisture is rarely clean.
Select the Chamber Size, Access, and Interior Configuration
Choosing a walk-in humidity chamber starts with the test load, not the empty room. Measure the largest product, fixture, cart, and handling space together. Then add clearance for airflow, sensor placement, and safe movement. A chamber that barely fits may restrict circulation and complicate maintenance. Leave room for growth. Test programs often expand after installation.
Access deserves equal attention. A single personnel door may suit small samples, while pallets or wheeled racks need a wider entry. Check the door swing, threshold height, floor loading, and turning radius before approval. Interior door handles, viewing windows, lighting, and emergency releases can affect daily usability. A wide door is not automatically better.
Interior configuration should match the test method. Adjustable stainless-steel racks support changing sample sizes, but solid shelves can block airflow. Perforated shelving usually improves exposure around products. Keep sensors away from direct humidifier discharge and cold surfaces. Place cable ports where they will not create trip hazards or leak paths. Consider drainage, cleaning access, and condensation control. Small details matter.
A common mistake is designing around today’s product only. That choice can become expensive. Review the required temperature and humidity ranges with a qualified chamber engineer. Confirm uniformity, recovery time, control accuracy, and sensor calibration under actual loading conditions. A larger chamber may consume more energy, yet an undersized interior can produce unreliable test results. Recheck the layout with operators before final fabrication.
How to Choose a Walk-In Humidity Chamber
Select the chamber size from the required working volume, then confirm the access opening and interior configuration needed for operators, carts, pallets, or test fixtures.
Size
Internal volume is calculated as width × depth × height. The examples range from 8 m³ to 125 m³.
Access
Clear door widths increase from approximately 0.9 m for personnel access to 1.8 m for large carts and palletized loads.
Interior configuration
Choose adjustable shelving for small products, a reinforced floor for carts, or open floor space for large fixtures and production samples.
Evaluate Construction Materials, Controls, Safety, and Maintenance
Choosing a walk-in humidity chamber requires more than checking its maximum size. Construction materials must match the test environment and expected contaminants. Stainless steel interiors resist corrosion, but welded seams, door hardware, and floor joints deserve equal attention. I would not treat stainless steel as automatically durable. Chloride-rich water can still damage poorly selected surfaces.
Controls should maintain stable humidity, temperature, and air distribution. Specify sensor accuracy, chamber uniformity, calibration access, and data-recording frequency. The U.S. Environmental Protection Agency recommends maintaining indoor relative humidity between 30% and 50% to limit mold growth. A chamber may operate far above that range, so condensation control becomes critical. Useful features include independent high-limit protection, door interlocks, low-water alarms, and emergency release hardware. IEC 60068 environmental testing guidance also emphasizes controlled test conditions and documented measurement methods.
Maintenance often decides the real operating cost. Choose removable filters, accessible humidifiers, replaceable door gaskets, and sloped floors that prevent standing water. Keep condensate away from electrical panels. OSHA guidance supports clear access and hazard controls around industrial equipment. Calibration records should identify the instrument, date, reference standard, and measurement uncertainty. Annual calibration may be inadequate for severe cycling or continuous production. That assumption needs review. A practical acceptance test should map several chamber locations, including corners, near the door, and beside the product load, before routine testing begins.

.svg)


