Food Safety Insights

In Eagle’s Advanced Insights Blog, experts share their know-how by keeping you up-to-date with the latest trends to ensure your inspection equipment keeps your products safe. Eagle is an industry leader when it comes to performance and innovation, and we’ll share the news that’s important to you to enhance your quality assurance program.

Suggest topic you would like to see at:

sale@generalmachinery.org

How to Choose Food X Ray Inspection Equipment?

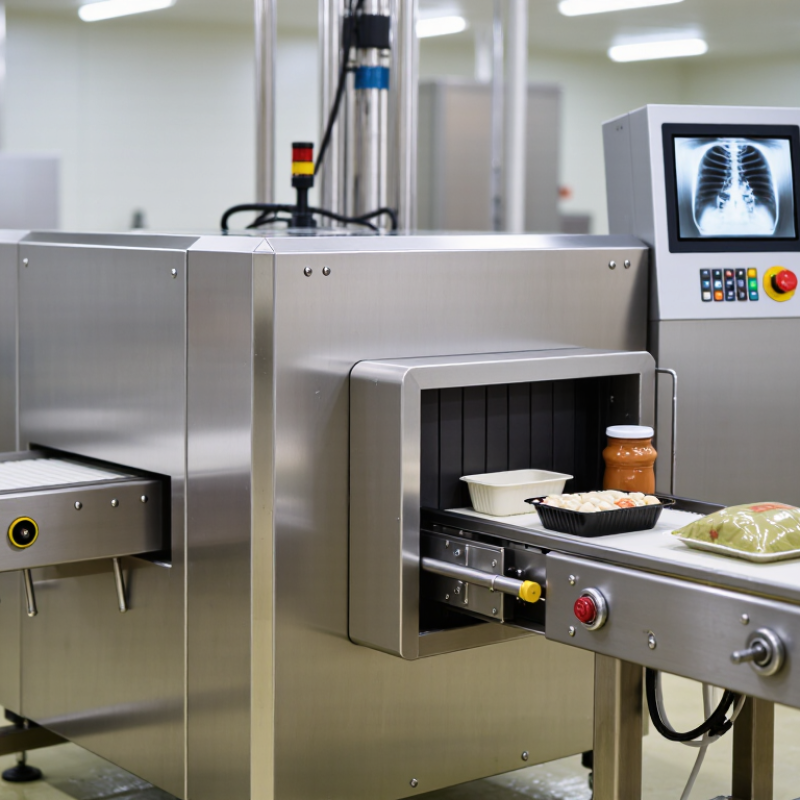
Choosing the right food x ray inspection equipment can directly affect product safety, production efficiency, and customer trust. In a busy processing line, a small defect may pass unnoticed while products move beneath stainless steel guards. A reliable system can detect metal, glass, stones, calcified bone, and other dense contaminants. However, detection performance is only one part of the decision.

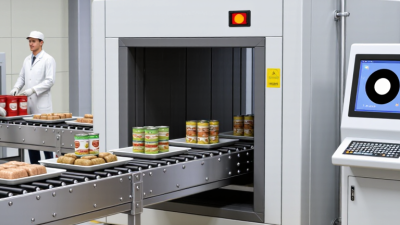
Manufacturers should examine product size, packaging material, temperature, speed, and line configuration. A frozen meal in a sealed tray creates different inspection challenges than a glass jar filled with sauce. Equipment should also support accurate rejection, clear images, simple cleaning, and secure data records. Hygienic design matters, especially around conveyors, seals, and product contact areas. A machine that is powerful but difficult to clean may create practical problems.

Compliance requirements also deserve careful attention. Buyers should compare equipment documentation with their food safety plan, internal standards, and applicable regulations. Experienced suppliers can explain sensitivity testing, calibration, validation, and routine verification without making unrealistic promises. No machine is perfect. Product composition, moisture, density, and vibration can influence results. That detail is easy to underestimate.

A sound selection process includes factory trials, sample testing, operator training, and after-sales support. Ask to see realistic performance data, not only impressive brochure figures. Check whether service engineers can respond quickly when production stops. The best food x ray inspection equipment is not always the most expensive option. It is the system that fits the product, line, risk level, and people using it every day. Careful questioning prevents expensive assumptions.

How to Choose Food X Ray Inspection Equipment?

Define Contamination Risks Using HACCP and Codex Preventive Controls

How to Choose Food X Ray Inspection Equipment?

HACCP should define the risk before equipment is selected. Codex General Principles of Food Hygiene, CXC 1-1969, Revised 2022, places hazard analysis and critical control points at the center of preventive control. The World Health Organization estimates that contaminated food causes 600 million illnesses and 420,000 deaths worldwide each year. These figures make detection more than a purchasing decision.

Start with the hazard register. Identify metal, glass, stones, mineral fragments, and dense bone risks by process step. Record product density, moisture, temperature, package shape, and production speed. X-ray performance depends on these details. Foil packaging may remain inspectable, but thick layers can reduce sensitivity. Not every foreign material is equally visible.

Test the actual product. Use validated test pieces near the smallest realistic contaminant size. Challenge the system at line start, changeovers, interruptions, and the fastest operating speed. Codex supports verification, corrective action, and documented records, so rejected packs need traceable handling. Ask for sensitivity data under your conditions, not only laboratory claims.

Keep in mind: no plan is perfect. Our practical mistake is often trusting a clean trial product too much. Seasonal recipes, worn belts, and uneven filling can change the result. Choose equipment that supports automatic rejection, fail-safe monitoring, easy sanitation, and clear verification records.

Match X-Ray Power to Product Density: Typical 80–160 kV Systems

How to Choose Food X-Ray Inspection Equipment?

Match X-Ray Power to Product Density: Typical 80–160 kV Systems

Choosing x-ray equipment starts with product density, thickness, and packaging. Low-density products often perform well around 80–100 kV. Examples include bakery items, snack bags, and thin plastic trays. Denser products may require 120–160 kV. Frozen meat blocks, glass jars, and packed sauces need stronger penetration. Higher voltage is not automatically better. It can reduce material contrast and make small contaminants harder to separate.

The U.S. Food and Drug Administration identifies penetration, image quality, and radiation safety as core cabinet x-ray considerations. A 2022 review in Food Control also emphasized product thickness, density differences, and detector performance. These factors interact. A 160 kV generator may inspect a dense jar effectively, yet perform poorly on a thin product with low contrast. Practical trials matter more than brochure figures. Test the heaviest product, the smallest target contaminant, and the fastest planned belt speed.

The World Health Organization estimates that contaminated food causes about 600 million illnesses worldwide each year. Reliable inspection therefore needs documented validation, not guesswork. Ask for test images at several power settings. Record false rejects, detection limits, and image stability. One overlooked detail is temperature. Frozen products can create different density patterns after thawing. That detail deserves testing. A sound specification may choose 100 kV for most products, then reserve 140–160 kV for selected dense formats. Oversizing the system can waste energy and compromise sensitivity. Under-sizing it creates blind spots.

How to Choose Food X-Ray Inspection Equipment? - Match X-Ray Power to Product Density: Typical 80–160 kV Systems

Use product density, package thickness, shape, and inspection objective to select an appropriate tube-voltage range. The values below are practical starting points for food inspection applications, not a substitute for application testing.

Product Density Class Typical Food Products Approximate Effective Product Thickness Suggested Tube Voltage Typical Inspection Challenge Expected Image Characteristics Recommended Equipment Considerations
Low density Low
Bakery products, cereals, snack foods, leafy vegetables, and many dry ingredients
Up to approximately 50 mm 80–100 kV Detecting glass, stone, and metal fragments in relatively light products Usually strong contrast between the product and dense contaminants; excessive power may reduce material contrast Prioritize fine detector resolution, stable low-power operation, and suitable conveyor speed rather than maximum penetration
Low-to-medium density Low to medium
Confectionery, biscuits, frozen vegetables, nuts, seeds, and granular products
Approximately 30–80 mm 90–110 kV Irregular product presentation, overlapping pieces, and small dense contaminants Good balance between penetration and contrast when product thickness varies across the pack Choose automatic exposure control, a detector with good dynamic range, and image tools for contamination and missing-product checks
Medium density Medium
Meat portions, poultry, cheese, ready meals, sauces, and filled trays
Approximately 40–100 mm 100–125 kV Higher background absorption caused by moisture, fat, protein, trays, and multilayer packaging Moderate contrast with improved penetration through thicker or more variable product loads Use application-specific test pieces, reliable rejection timing, hygienic construction, and sufficient generator power for the line speed
Medium-to-high density Medium to high
Dense meat blocks, compact cheese, canned or jarred foods, and thick prepared meals
Approximately 60–130 mm 115–140 kV Product absorption and package walls can mask small contaminants, especially near the center of the pack Improved penetration through dense sections; material contrast may decrease as tube voltage increases Consider a larger inspection aperture, optimized beam geometry, higher detector sensitivity, and validated inspection from the most difficult product orientation
High density High
Large dense meat products, thick frozen blocks, dense composite packs, and heavy multipacks
Approximately 90–160 mm 130–160 kV Limited penetration through the product center and increased attenuation from packaging or multiple layers Greater penetration and a more consistent image through thick products; very small low-density defects may be more difficult to distinguish Use a high-output generator, a high-sensitivity detector, robust cooling, accurate exposure control, and site-specific performance validation
Very thick or overlapping product load High and variable
Bulk products, stacked packs, large cartons, or products with significant overlap
More than approximately 130 mm 145–160 kV, subject to testing Uneven absorption, overlapping items, and reduced sensitivity at the thickest section Maximum practical penetration within the system range, but image contrast and sensitivity must be confirmed with real products Evaluate reduced product loading, pack orientation, multiple-view inspection, slower belt speed, or a different inspection configuration if required
Selection note: Tube voltage (kV) controls the energy and penetrating ability of the X-ray beam, while tube current and exposure time also affect image quality and dose. The final setting should be established through application trials using the actual product, package, maximum thickness, line speed, and certified test pieces. Higher kV is not always better because excessive energy can reduce contrast for some contaminants.

Set Detection Targets for 0.3–0.8 mm Metal and 1.5–3.0 mm Glass

How to Choose Food X Ray Inspection Equipment?

Set clear detection targets before comparing food X-ray inspection equipment. For many packaged foods, a practical starting range is 0.3–0.8 mm metal and 1.5–3.0 mm glass. These figures are targets, not universal guarantees. Detection depends on product density, package thickness, moisture, salt content, and line speed. A dense sauce may hide smaller contaminants than dry biscuits. Glass fragments can also appear differently when their orientation changes.

The World Health Organization estimates that foodborne hazards cause about 600 million illnesses and 420,000 deaths worldwide each year. This supports a risk-based inspection strategy, consistent with Codex General Principles of Food Hygiene, CXC 1-1969. Test pieces should represent realistic production conditions. Use certified samples inside the actual package, not only outside it. Check the center, edges, and product overlaps.

Verification must include repeated tests at normal and worst-case speeds. I would not accept one successful challenge test as proof of stable performance. Temperature, vibration, film wrinkles, and product changes can reduce sensitivity. Keep records for each shift, product, and test position. Sometimes the advertised target looks impressive but fails after packaging changes. That is the part worth questioning. Choose equipment that provides reliable rejection, clear images, hygienic construction, and traceable test results.

Food X-Ray Inspection Detection Targets

The chart shows practical target ranges for food X-ray inspection setup: metal targets from 0.3–0.8 mm and glass targets from 1.5–3.0 mm. Actual sensitivity depends on product density, package format, line speed, detector geometry, and validation testing.

Check Throughput, IP69K Hygiene Ratings, and Line-Speed Compatibility

How to Choose Food X Ray Inspection Equipment?

Throughput should be measured with your real products, not only the machine’s maximum rating. Record pack size, product spacing, and the busiest production period. A system must inspect every item without creating a queue before the scanner. Test mixed product sizes, because ideal samples can hide practical delays. Line-speed compatibility matters just as much. Confirm the conveyor speed range and acceleration behavior. If the inspection system reacts too slowly, images may blur or rejected packs may miss the correct position. Ask for a live trial using your fastest normal setting.

Hygiene design deserves equal attention. An IP69K rating indicates strong resistance to high-pressure, high-temperature washdown. However, the rating does not replace good installation or maintenance. Check sloped surfaces, sealed cable connections, accessible inspection windows, and drainage around the frame. Food residue can collect in small gaps. It often does. Cleaning teams should be able to reach those areas without removing complicated parts. Verify materials and surface finishes for your cleaning chemicals, temperature, and sanitation schedule.

Data reliability also affects equipment choice. Review detection records, reject verification, alarm history, and user access controls. Ask how quickly operators can identify a false reject and investigate it. A short trial may not reveal performance changes during long shifts. Repeat testing after heat, vibration, and routine cleaning. A first estimate is often wrong. Leave room for future speed increases, but avoid paying for capacity the line cannot use. The best specification is practical, measurable, and proven on your own production floor.
Validate Reject Accuracy, Test-Piece Results, and False-Positive Rates

How to Choose Food X Ray Inspection Equipment?

Reject accuracy should be tested under real production conditions, not only in a quiet demonstration. During commissioning, I check whether every contaminated test pack reaches the reject point. The conveyor should run at normal speed, with realistic product spacing and packaging. Test pieces must represent likely defect sizes, materials, and positions. Tiny differences matter.

Use several test-piece locations. Place them near the center, edges, and difficult product zones. Record detection results separately for each location.

The reject device must remove the correct pack without disturbing nearby products. A visible reject confirmation helps operators identify failures quickly. Keep signed records for each trial.

False positives deserve equal attention.

An unnecessary reject wastes food, time, and operator confidence. Measure false-positive rates across several shifts, including product changes and temperature variations. A single successful hour proves very little. Test packs can also create misleadingly clean results. I still find this easy to overlook.

Ask suppliers for raw test data, calibration procedures, and maintenance limits. Then repeat the checks with your own products. Software settings may improve sensitivity, but excessive sensitivity can increase false rejects. Review every failed test instead of hiding it. The best equipment supports repeatable decisions, clear evidence, and practical operator control.

Any Questions? We Are Here for You

Contact Us

Contact Us

Request information

Ask us a question
Service Support

Service Support

Available 24 hours a day, 7 days a week.

Get in Touch
Find a representative

Find a representative

Contact your local representative

View Locations